Mobility training step by step for stroke recovery 2026
Recovering mobility after stroke often feels overwhelming. You want to walk independently again, but you’re unsure where to start or how to progress safely. This guide breaks down the exact steps to rebuild your motor function through structured, proven training phases. You’ll learn what preparation you need, which exercises to do first, and how to advance without risking setbacks.
Table of Contents
- Pre-Training Preparation: What You Need Before Starting
- Step 1: Initial Range Of Motion And Balance Exercises
- Step 2: Progressive Gait And Functional Mobility Training
- Step 3: Use Of Assistive Technology To Enhance Training
- Common Mistakes And Troubleshooting In Mobility Training
- Expected Results And Timelines For Mobility Improvement
- Explore Rehabilitation Aids And Home Neurorehab Systems
- FAQ
Key takeaways
| Point | Details |
|---|---|
| Structured phases optimize safe progress | Following a phased approach from range of motion to gait training prevents injury while building functional mobility systematically. |
| Assistive technology boosts adherence | Interactive devices increase training consistency by 25%, making recovery more engaging and effective at home. |
| Rest and monitoring prevent setbacks | Scheduled rest reduces muscle fatigue by 50%, protecting you from overexertion injuries during rehabilitation. |
| Combining cognitive and physical tasks accelerates gains | Dual-task exercises speed functional improvements by 20% compared to physical training alone. |
| Most achieve independent walking within three months | 65% of stroke patients regain walking ability in this timeframe with consistent guided training. |
Pre-training preparation: what you need before starting
Medical clearance is essential before beginning any mobility program. Your doctor must verify you’re stable enough to exercise and identify any contraindications like uncontrolled blood pressure or recent cardiac events. This single step prevents dangerous complications during training.
Gather your equipment before day one. You’ll need a sturdy walker or cane appropriate for your balance level, comfortable non-slip footwear, and a stable chair for seated exercises. If balance is significantly impaired, arrange for parallel bars or a gait belt. Having everything ready eliminates delays and keeps you focused on recovery.
Set clear, measurable goals with your therapist. Instead of vague aims like “walk better,” target specific milestones such as “walk 50 feet with a cane” or “stand unsupported for two minutes.” Concrete goals give you direction and make progress visible. Review your rehabilitation exercises prerequisites to understand what your baseline abilities should be.
Arrange caregiver or therapist support for initial sessions. Someone trained in motor rehab preparation should supervise your first attempts at new exercises. They’ll correct your form, catch balance lapses, and adjust difficulty appropriately. Solo training comes later once you master the basics safely.
Essential preparation checklist:
- Complete medical evaluation and obtain written clearance
- Verify no acute conditions or unstable vital signs
- Purchase or borrow appropriate assistive devices
- Establish baseline mobility measurements
- Schedule supervised initial training sessions
- Create a quiet, clutter-free training space at home
| Preparation Item | Purpose | Timeline |
|---|---|---|
| Medical clearance | Verify safety to exercise | 1-2 weeks before starting |
| Equipment acquisition | Ensure proper support tools available | 1 week before starting |
| Goal setting session | Define measurable targets | Initial consultation |
| Caregiver training | Enable safe supervision | Before first session |
Pro Tip: Schedule your training sessions at the same time daily. Consistency builds habit and helps your body adapt to the routine more efficiently.
 Step 1: initial range of motion and balance exercises
Effective mobility training begins with gentle joint movement and stability work lasting four to six weeks. This foundation phase restores flexibility and prepares muscles for weight-bearing activities. Start with passive movements where a therapist or caregiver moves your limbs, then progress to active exercises you perform independently.
Passive range of motion involves someone else gently moving your affected joints through their full arc. This maintains joint health and prevents stiffness even when you can’t move the limb yourself. Focus on ankles, knees, hips, and shoulders with 10 repetitions per joint, twice daily. As voluntary control returns, transition to active-assisted movements where you initiate the motion and receive help completing it.
Balance exercises start simple and progress gradually. Begin seated, shifting your weight side to side while a caregiver provides light support. Advance to standing with parallel bar support, practicing weight shifts and single-leg stance for five to ten seconds. Eventually, progress to standing unsupported while reaching for objects at different heights. These top rehabilitation exercises build the stability needed for walking.
Beginner balance sequence:
- Seated weight shifts (10 repetitions each direction)
- Sit-to-stand transfers with armrest support (5 repetitions)
- Standing weight shifts at parallel bars (10 repetitions)
- Tandem stance (heel-to-toe) for 10 seconds
- Single-leg stance for 5-10 seconds per leg
Train five days per week with two rest days for recovery. Each session should last 20 to 30 minutes initially, gradually extending to 45 minutes as endurance builds. Stop immediately if you experience sharp pain, severe dizziness, chest discomfort, or sudden weakness. Mild muscle fatigue is normal, but exhaustion means you’re overdoing it.
Watch for signs you need to scale back. Increased spasticity, persistent soreness lasting over 24 hours, or difficulty sleeping indicate overexertion. Reduce session duration by half and add an extra rest day. Progress resumes once your body adapts to the current intensity.
Pro Tip: Place a mirror in front of you during balance exercises. Visual feedback helps your brain relearn proper posture and weight distribution more quickly.
Step 2: progressive gait and functional mobility training
Walking practice begins once you achieve stable standing for 30 seconds unsupported. Start with parallel bars, taking small steps while maintaining upright posture and even weight distribution. Your therapist will monitor foot clearance, stride length, and hip extension. Poor form now leads to compensatory movement patterns that become difficult to correct later.
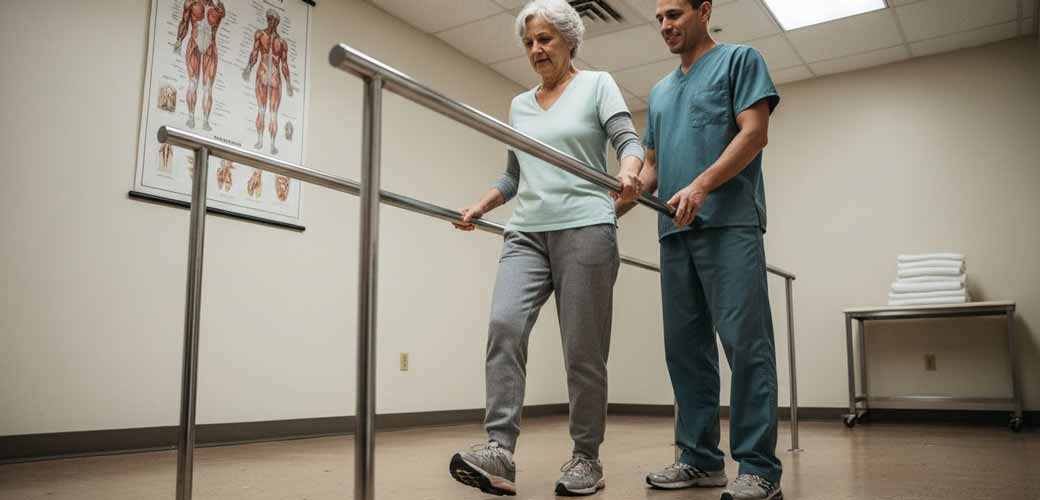
Assistive devices provide temporary support during this transition. Progress through this sequence: parallel bars, front-wheeled walker, standard walker, quad cane, single-point cane, and finally independent ambulation. Don’t rush progression. Each device change requires one to two weeks of practice before moving to the next level. Using the right support prevents falls and builds confidence.
Combining gait training with cognitive tasks accelerates recovery by up to 20%. Dual-task exercises might include walking while counting backward by threes, carrying a tray with cups, or naming animals alphabetically. These challenges force your brain to coordinate movement and thinking simultaneously, mimicking real-world demands. Start with simple tasks and increase complexity as walking becomes more automatic.
Functional mobility means performing daily activities, not just walking in a straight line. Practice getting in and out of chairs, navigating doorways, turning corners, and managing uneven surfaces. Include stair training once you walk 150 feet independently on level ground. These neurological rehabilitation exercises translate directly to home independence.
Progressive walking milestones:
- Week 1-2: 25 feet with parallel bars
- Week 3-4: 50 feet with front-wheeled walker
- Week 5-6: 100 feet with standard walker
- Week 7-8: 150 feet with quad cane
- Week 9-10: 200 feet with single-point cane
- Week 11-12: 300 feet independently
Track your progress using standardized tests. The Timed Up and Go measures how long it takes to stand from a chair, walk 10 feet, turn, and return to sitting. Under 10 seconds indicates good mobility; over 30 seconds signals high fall risk. The 6-Minute Walk Test measures endurance and cardiovascular fitness during recovery. Following a structured rehabilitation workflow ensures you hit these benchmarks safely.
| Milestone | Expected Timeline | Assessment Method |
|---|---|---|
| Stand unsupported 30 seconds | 4-6 weeks | Timed static balance test |
| Walk 50 feet with device | 6-8 weeks | Distance measurement |
| Timed Up and Go under 30 sec | 8-10 weeks | Functional mobility test |
| Independent walking 300 feet | 10-12 weeks | 6-Minute Walk Test |
Step 3: use of assistive technology to enhance training
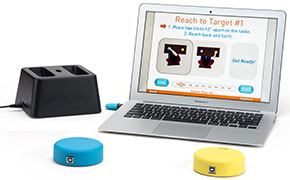
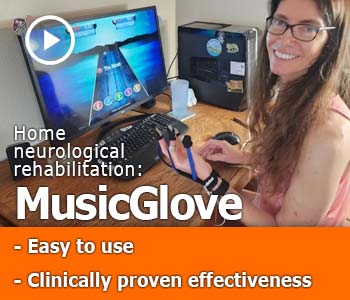
Interactive rehabilitation devices transform boring repetitions into engaging activities. Systems like FitMi use sensors and games to guide exercises while tracking your performance automatically. This immediate feedback keeps you motivated and ensures correct movement patterns. Home-based use of technology improves adherence by 25% compared to standard exercise sheets.
These devices work by breaking complex movements into achievable challenges. Each successful repetition earns points or unlocks new levels, tapping into the same reward systems that make games addictive. You’re more likely to complete your prescribed reps when the activity feels purposeful rather than tedious. The technology also adjusts difficulty automatically, ensuring you’re always working at the edge of your current ability.
Portable rehabilitation tools fit easily into home routines. Tablet-based systems require minimal space and setup time. Most devices connect wirelessly to track your progress over weeks and months, showing exactly how your mobility improves. This data helps therapists adjust your program remotely and keeps you accountable between clinic visits.
Benefits of technology-assisted training:
- Automatic tracking eliminates manual logging
- Gamification increases motivation and adherence
- Immediate feedback corrects poor form instantly
- Progress visualization shows incremental improvements
- Remote monitoring enables therapist adjustments
- Variety prevents training boredom
Combine device use with professional guidance for best results. Your therapist prescribes specific exercises within the system based on your assessment. They review your performance data weekly and modify difficulty or exercise selection accordingly. Technology enhances therapy but doesn’t replace the expertise needed to design your program. Understanding why home rehabilitation works best when combined with professional oversight helps you maximize recovery.
The role of home rehabilitation extends beyond convenience. Training in your actual living environment prepares you for real-world challenges like navigating your kitchen or bathroom. Interactive devices make this home practice more effective and sustainable long-term.
Pro Tip: Use technology sessions as your “fun” training days between more challenging clinic visits. This mental break keeps you engaged with rehabilitation overall.
 Common mistakes and troubleshooting in mobility training
Overexertion is the biggest rookie mistake. You’re eager to recover quickly, so you train too hard, too often. This backfires spectacularly. Scheduled rest reduces muscle fatigue by 50% and prevents injuries that set you back weeks. Recovery happens during rest, not during exercise. Pushing through exhaustion damages tissues and delays healing.
Incorrect form creates movement patterns your brain will automate, making them nearly impossible to unlearn later. If you lean heavily to one side while walking, your brain interprets that as “correct” walking. Soon you can’t walk any other way, even after strength returns. Invest time perfecting form early. One properly executed repetition beats ten sloppy ones every time.
Monitor vital signs and pain levels throughout training. Keep a simple log noting your blood pressure, heart rate, and pain score before and after each session. Sharp increases or persistent pain signal problems. Mild discomfort is acceptable; anything more means you need to modify your approach. Review your exercise guide for stroke recovery to understand appropriate intensity levels.
Warning signs requiring immediate action:
- Chest pain or pressure during activity
- Severe shortness of breath not relieved by rest
- Sudden severe headache or vision changes
- Extreme dizziness or loss of balance
- New numbness or weakness in any limb
- Heart rate over 220 minus your age
Ignoring these symptoms can cause serious harm. Stop training immediately and contact your doctor if any occur. It’s better to pause one session than to end up hospitalized, losing weeks of progress.
Rest days are mandatory, not optional. Schedule two non-consecutive rest days weekly, increasing to three if you feel persistently tired. Light activities like gentle stretching are fine, but no intensive training. Your muscles need time to repair and strengthen. Skipping rest guarantees plateaus or regression.
Pro Tip: If you’re unsure whether pain is normal soreness or injury, use this rule: soreness peaks 24 to 48 hours after activity and gradually improves. Injury pain worsens with activity and doesn’t improve with rest.
Expected results and timelines for mobility improvement
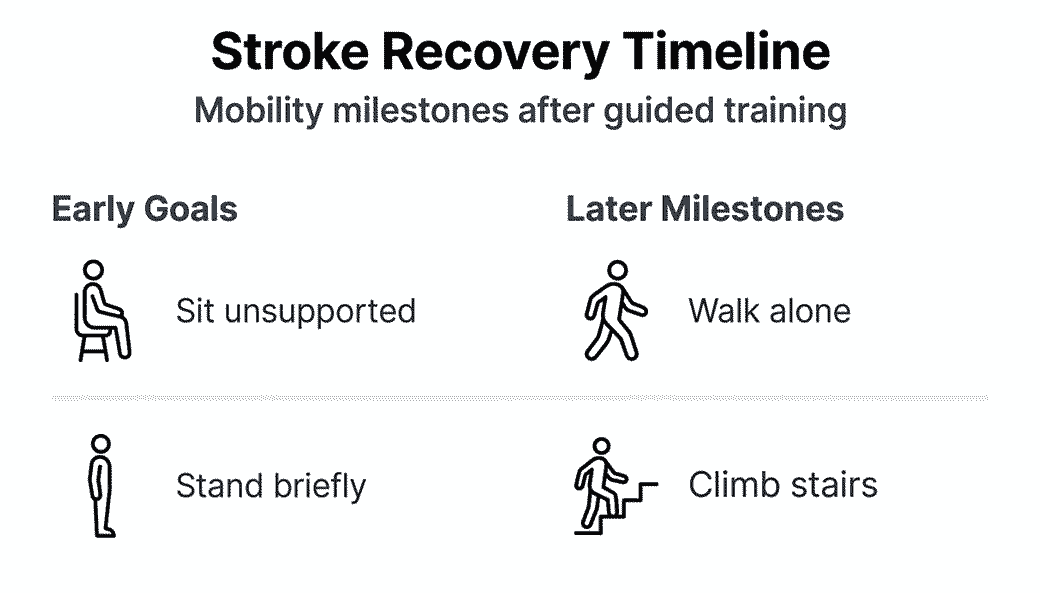
Sixty-five percent of stroke patients achieve independent walking within three months of consistent guided training. This doesn’t mean effortless, perfect gait. It means walking household distances without assistance or devices. Community ambulation, covering longer distances outdoors, typically takes six to nine months. Your individual timeline depends on stroke severity, age, pre-stroke fitness, and training consistency.
Measure progress objectively using standardized tests. The Berg Balance Scale scores 14 balance tasks from 0 to 56 points. Scores over 40 indicate low fall risk; under 20 signals high risk requiring assistance. Repeat testing monthly shows whether your program is working. The Functional Ambulation Categories rate walking ability from 0 (non-functional) to 5 (independent on all surfaces). Most patients gain one category level every four to six weeks with proper training.
Combining cognitive and physical rehabilitation produces superior outcomes. Studies show dual-task training improves real-world function more than physical exercises alone because daily life constantly demands simultaneous physical and mental effort. Walking while talking, carrying groceries while navigating curbs, these situations require integrated brain-body coordination that single-task training doesn’t develop.
Typical recovery milestones:
- Month 1: Sit-to-stand independently, stand 30+ seconds unsupported
- Month 2: Walk 50-100 feet with assistive device
- Month 3: Walk 150-300 feet with minimal assistance
- Month 4-6: Independent household ambulation
- Month 6-9: Community ambulation with endurance building
- Month 9-12: Return to most pre-stroke mobility activities
Celebrate small victories. Reducing your Timed Up and Go score by five seconds represents significant functional improvement even if you’re not walking independently yet. Taking three fewer steps to turn around indicates better balance control. These incremental changes compound into major improvements over months. Following evidence-based neurological recovery exercises ensures steady progress toward your goals.
| Assessment Tool | Initial Score | 3-Month Target | 6-Month Target |
|---|---|---|---|
| Berg Balance Scale | 20-25 | 35-40 | 45-50 |
| Timed Up and Go | 30-40 seconds | 15-20 seconds | 10-15 seconds |
| 6-Minute Walk | 100-150 feet | 400-600 feet | 800-1000 feet |
| Functional Ambulation | Level 1-2 | Level 3-4 | Level 4-5 |
Patience is essential. Your brain is literally rewiring itself, creating new neural pathways to control movement. This biological process can’t be rushed beyond its natural pace. Consistent training over months yields results; sporadic intense bursts accomplish little. Trust the process and maintain your schedule.
Explore rehabilitation aids and home neurorehab systems
The structured training approach outlined above works best when supported by appropriate equipment and technology. Tisele Rehab offers specialized rehabilitation aids designed specifically for stroke recovery, matching each phase of your mobility progression. From basic stability tools to advanced interactive systems, these products integrate seamlessly into your training routine.

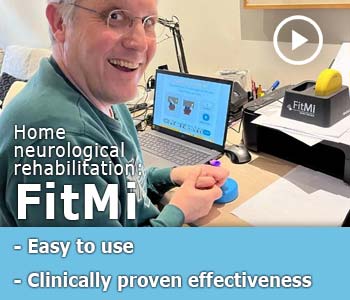
The FitMi home neurorehabilitation system transforms repetitive exercises into engaging activities that track your progress automatically. This technology delivers the motivation and feedback that traditional exercise sheets can’t provide, making daily training something you actually look forward to completing. Combined with professional guidance, FitMi helps you maximize recovery between clinic visits.
Explore the complete range of Tisele Rehab rehabilitation kits to find solutions matching your current mobility level and goals. Each product is selected for proven effectiveness in neurological recovery, giving you confidence that your investment supports genuine progress. Your rehabilitation journey deserves tools that work as hard as you do.
FAQ
What safety precautions should I take during mobility training?
Monitor for dizziness, excessive fatigue, chest discomfort, or sharp pain during every session. Schedule at least two rest days weekly to allow muscle recovery and prevent overuse injuries. Always follow your doctor’s specific restrictions regarding weight-bearing, exercise intensity, or contraindicated movements. Have a phone nearby during home training in case you need emergency assistance.
How soon can I expect to walk independently after stroke?
Most stroke survivors regain walking within three months of consistent guided training, though timelines vary based on stroke severity and individual factors. Maintaining your prescribed exercise schedule and combining physical with cognitive training accelerates this timeline. Missing sessions or inconsistent effort significantly delays progress, so adherence is crucial for meeting typical recovery milestones.
Can assistive technology improve my rehabilitation outcomes?
Home rehabilitation technology boosts adherence by 25% compared to traditional exercise sheets by making training more engaging and automatically tracking progress. Interactive devices provide immediate feedback that helps you correct poor form and maintain motivation during solo practice. However, technology works best when combined with professional guidance to ensure your program targets your specific deficits appropriately.
What are common mistakes to avoid during mobility training?
Avoid training through excessive fatigue or joint strain, which damages tissues and delays recovery rather than accelerating it. Schedule mandatory rest periods even when you feel motivated to push harder. Always prioritize correct exercise technique over repetition count, as poor form creates compensatory movement patterns that become difficult to correct later. Never skip scheduled medical follow-ups or ignore new symptoms that develop during training.
Recommended
38
Get inspired by a stroke recovery story
Home rehabilitation at full speed.
My husband suffered a severe stroke on August 19, 2020, which paralyzed him on the right side. Thanks to FitMi he has made huge progress since then. He still has no strength in his right arm, but now he can walk with a cane, his speech has improved significantly, and he is fighting and rehabilitating at full speed. We are very happy that we bought this FitMi kit for him, so he can continue his training and exercises at home. We are encouraged by this program and the positive reviews we read from others who used it. Thank God we found this kit and thank you for your support. It is a wonderful program.
Kate (08.09.2020)